Overview
This project is my hands-on computer-vision lab. Instead of one big model, it is a sequence of small, focused scripts - each one teaching a single idea and building on the last. I start with the absolute basics of OpenCV (reading an image, blurring it, finding edges, drawing shapes), then move up to YOLOv8 - a state-of-the-art model that can find objects in a photo, in a live webcam feed and in video - and finish with two practical applications: counting unique objects across a video and a motion-based burglar detector.
Everything runs in Python with two tools doing the heavy lifting: OpenCV
(cv2) for reading, drawing and showing frames, and Ultralytics YOLOv8 for
the actual object detection. The images on this page are real output from running
these exact scripts.
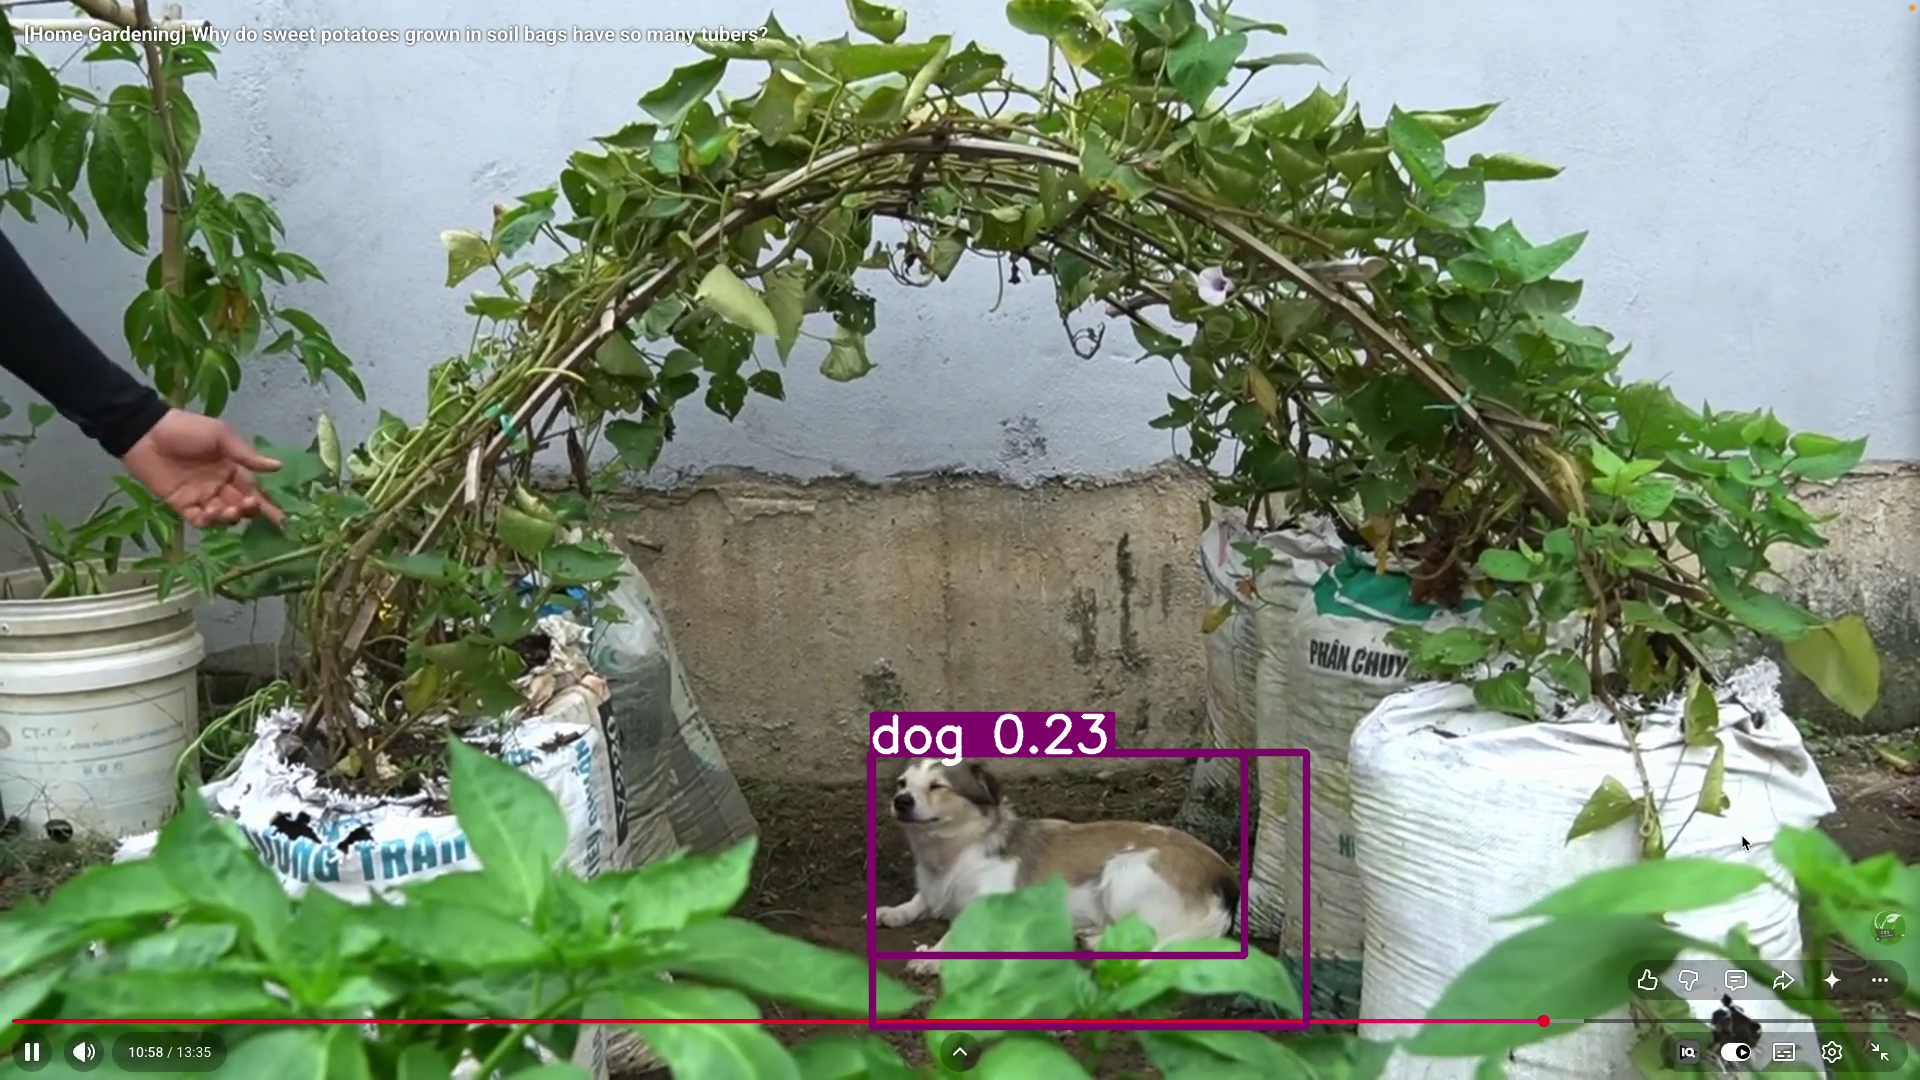
Object detection in action - YOLOv8 finds the dog in a busy garden scene and draws the labelled box itself. Tracing the dog's exact outline is the job of the companion Instance Segmentation with YOLOv8 project.
A few core concepts first
Before the scripts, here are the ideas the whole project leans on.
OpenCV and the BGR image
OpenCV (cv2) is the standard library for classic computer vision. An image
in OpenCV is just a NumPy array of pixels with shape (height, width, 3).
The 3 is the colour channels - and importantly OpenCV stores them as BGR
(Blue, Green, Red), not RGB. That is why every colour tuple below, like
(0, 255, 0) for green, is written Blue-Green-Red.
YOLO - "You Only Look Once"
YOLO is a deep neural network that looks at an image once and predicts
all the objects in a single pass - that is what makes it fast enough for live
video. YOLOv8 is the version from Ultralytics. I use the n (nano) weights,
yolov8n.pt, which are tiny and fast.
The COCO classes (why classes=[16])
YOLOv8 is pre-trained on the COCO dataset, which has 80 object classes, each with a fixed number. A few that show up in this project:
16→ dog58→ potted plant
When I write classes=[16], I am telling the model "ignore everything except
dogs". This keeps the output clean when I only care about one kind of object.
The bounding box
A bounding box is the model's answer to where an object is: a rectangle
(x1, y1, x2, y2) drawn around it. Detection gives you boxes - that is what every
YOLOv8 script on this page draws. (For a pixel-perfect outline of the object's
exact shape - a mask - see the companion
Instance Segmentation project.)
Detection vs tracking (the persistent ID)
Plain detection treats every frame independently. Tracking
(model.track(..., persist=True)) adds memory: it keeps an ID on each object
across frames, so the dog in frame 1 and the dog in frame 50 are recognised as
the same dog. That persistent ID is what makes counting possible.
1 · OpenCV image fundamentals
The very first script reads an image and applies the three classic OpenCV operations: grayscale, Gaussian blur, and Canny edge detection.

Left to right: the original image, grayscale, Gaussian blur, and the Canny edge map - the four outputs this script produces.
import cv2
img1=cv2.imread("images/plumeria.webp")
# cv2.imshow("Plumeria", img1)

cv2.imwrite("save-plumeria.webp", img1)

## resizing grey blurring edges
img_resize=cv2.resize(img1,(2000,2000))
img_gray=cv2.cvtColor(img_resize,cv2.COLOR_BGR2GRAY)
img_blur=cv2.GaussianBlur(img1,(21,21),40)
## kernel size should be odd number and greater than 1.
## kernel splits perfectly
## Odd Size (3 × 3): Has a clear center

img_edges=cv2.Canny(img1,80,240)
## high threshold --> 240   --- hard // higer than 240 are considered as edges
## low thereshold --> 80.   ---- soft // lower than 80 are considered as edges
## range 80-240  probability considered as edges if connect to high threshold edges
cv2.imshow("resized_img",img_resize)
cv2.imshow("gray_img",img_gray)
cv2.imshow("blur_img",img_blur)
cv2.imshow("edges_img",img_edges)


cv2.waitKey(0)
cv2.destroyAllWindows()
Line by line:
cv2.imread(...)loads the image off disk into a NumPy array of BGR pixels.cv2.imwrite(...)saves a copy back out - the round-trip that proves the load worked.cv2.resize(img1, (2000, 2000))stretches the image to a fixed 2000×2000.cv2.cvtColor(..., COLOR_BGR2GRAY)converts colour to a single grayscale channel. Many algorithms (edges, motion) only need brightness, not colour.cv2.GaussianBlur(img1, (21, 21), 40)smooths the image. The(21, 21)is the kernel - the little window slid over every pixel to average its neighbours. It must be odd so it has a clear centre pixel; bigger kernel = stronger blur.cv2.Canny(img1, 80, 240)is edge detection with two thresholds. Anything with a gradient above240is definitely an edge; below80is definitely not; the in-between80-240band counts as an edge only if it connects to a strong one. This double-threshold trick is what makes Canny clean.cv2.imshow(...)opens a window per result;cv2.waitKey(0)waits for a key press;cv2.destroyAllWindows()closes them. This open/wait/close trio ends almost every OpenCV script.
2 · Drawing on images
Before detecting objects automatically, it helps to draw boxes and labels by hand - because that is exactly what the detection code does for you later, just programmatically. This script draws on a blank black canvas.
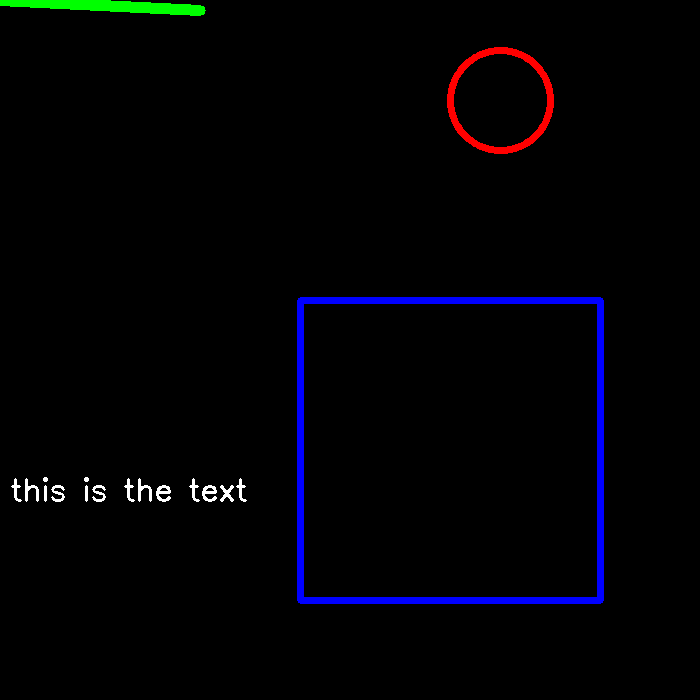
A blank canvas with each primitive drawn on it: a green line, a blue rectangle, a red circle and white text.
import cv2
import numpy as np

img=cv2.imread("images/plumeria.webp")

canvas=np.zeros((700,700,3),dtype=np.uint8)


cv2.imshow("Canvas", canvas)

pt1=(0,0)
pt2=(200,10)
color=(0,255,0)
cv2.line(canvas, pt1, pt2, color, thickness=10, lineType=cv2.LINE_8, shift=0)
cv2.rectangle(canvas,(300,300),(600,600),(255,0,0),thickness=5)
cv2.circle(canvas,(500,100),50,(0,0,255),thickness=5)
cv2.putText(canvas,"this is the text",(10,500),cv2.FONT_HERSHEY_SIMPLEX,1,(255,255,255),thickness=2)
cv2.imshow("Line", canvas)
cv2.waitKey(0)
cv2.destroyAllWindows()
Line by line:
np.zeros((700, 700, 3), dtype=np.uint8)makes a 700×700 black image - every pixel(0, 0, 0).uint8because pixel values run0-255.cv2.line(canvas, (0,0), (200,10), (0,255,0), thickness=10)draws a green line from the top-left to(200, 10). Remember the colour is BGR, so(0, 255, 0)is pure green.cv2.rectangle(canvas, (300,300), (600,600), (255,0,0), 5)draws a blue box given its top-left and bottom-right corners.cv2.circle(canvas, (500,100), 50, (0,0,255), 5)draws a red circle of radius 50 centred at(500, 100).cv2.putText(...)writes "this is the text" in white at(10, 500).
These four primitives - line, rectangle, circle, text - are the exact tools the detection scripts use to annotate their results.
3 · Object detection on an image
Now the first real model. Just a handful of lines turns a photo into a labelled detection.
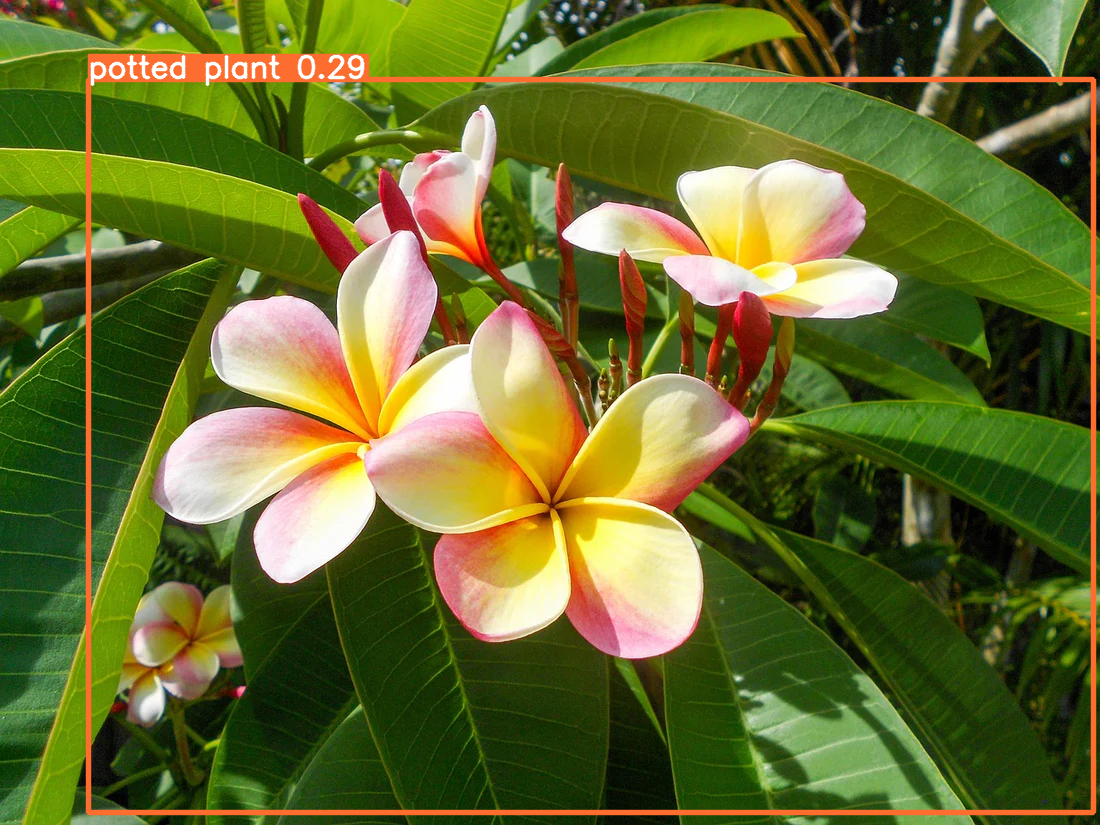
YOLOv8 running on a still image and drawing the box + label itself - here it reads the flowering plant as the COCO class "potted plant".
import cv2
from ultralytics import YOLO
model = YOLO("yolov8n.pt")

image=cv2.imread("images/plumeria.webp")
results=model(image)

annoted_image=results[0].plot()
cv2.imshow("Object Detection", annoted_image)
cv2.waitKey(0)
cv2.destroyAllWindows()
Line by line:
YOLO("yolov8n.pt")loads the pre-trained nano model. The first run downloads the weights; after that they're cached.model(image)runs inference. It returns a list of results (one per image)- hence
results[0]for our single image.
- hence
results[0].plot()is the convenience method that does all the drawing for us- boxes, class names and confidence scores - and returns a ready-to-show image.
This is OpenCV's
rectangle+putTextfrom the previous section, automated.
- boxes, class names and confidence scores - and returns a ready-to-show image.
This is OpenCV's
- The open/wait/close trio displays it.
4 · Live camera detection
The same idea, but the source is a live webcam instead of a file. The only real change is the input and an endless loop.
import cv2
from ultralytics import YOLO
model = YOLO("yolov8n.pt")
cap = cv2.VideoCapture(0)

while True:
    ret,frame=cap.read()
    if not ret:
        break
    results=model(frame)
    annoted_frame=results[0].plot()
    cv2.imshow("Live Camera Object Detection", annoted_frame)
    if cv2.waitKey(1) & 0xFF == ord('q'):
        break
cap.release()
cv2.destroyAllWindows()
Line by line:
cv2.VideoCapture(0)opens the default camera (device0). Pass a filename instead and the same loop reads a video file.cap.read()grabs the next frame. It returnsret(did it work?) and theframeitself.if not ret: breakexits cleanly when the stream ends.- Inside the loop it's the exact detection from section 3, run on every frame.
cv2.waitKey(1) & 0xFF == ord('q')waits 1 ms for a key and quits onq- the standard way to make a real-time OpenCV window closable.cap.release()frees the camera at the end.
This one needs a physical webcam, so there's no captured frame for it - but it is the bridge between the still-image detector above and the video scripts below.
5 · Detecting one class in a video
Reading a video file and detecting only one class - here dogs (16) in a
gardening clip.
Filtering to
classes=[16]makes YOLOv8 report only the dog and skip every other object in the busy scene.
import os
import cv2
from ultralytics import YOLO
model = YOLO("yolov8n.pt")
print(model.names)

VIDEO_PATH = os.path.join(os.path.dirname(__file__), "test-agri.mp4")
cap=cv2.VideoCapture(VIDEO_PATH)
if not cap.isOpened():
    raise FileNotFoundError(f"Could not open video: {VIDEO_PATH}")
while True:
    ret,frame=cap.read()
    if not ret:
        break
    results=model(frame, classes=[16])
    annoted_frame=results[0].plot()
    cv2.imshow("video ", annoted_frame)
    if cv2.waitKey(1) & 0xFF == ord('q'):
        break

cap.release()
cv2.destroyAllWindows()
Line by line:
print(model.names)dumps the full{0: 'person', 1: 'bicycle', …}class dictionary - that's how you discover that dog is16.os.path.join(os.path.dirname(__file__), "test-agri.mp4")builds the video path relative to the script file, so it works no matter where you run it from.cap.isOpened()guards against a missing/corrupt file and raises a clear error instead of silently looping on nothing.model(frame, classes=[16])is the key line: detect, but keep only dogs.- The rest is the familiar read → plot → show → quit-on-
qloop.
6 · Counting unique objects
Detection alone can't count - if a plant appears in 200 frames, that's 200
detections, not 200 plants. The fix is tracking with persistent IDs and a
Python set, which only stores each ID once.
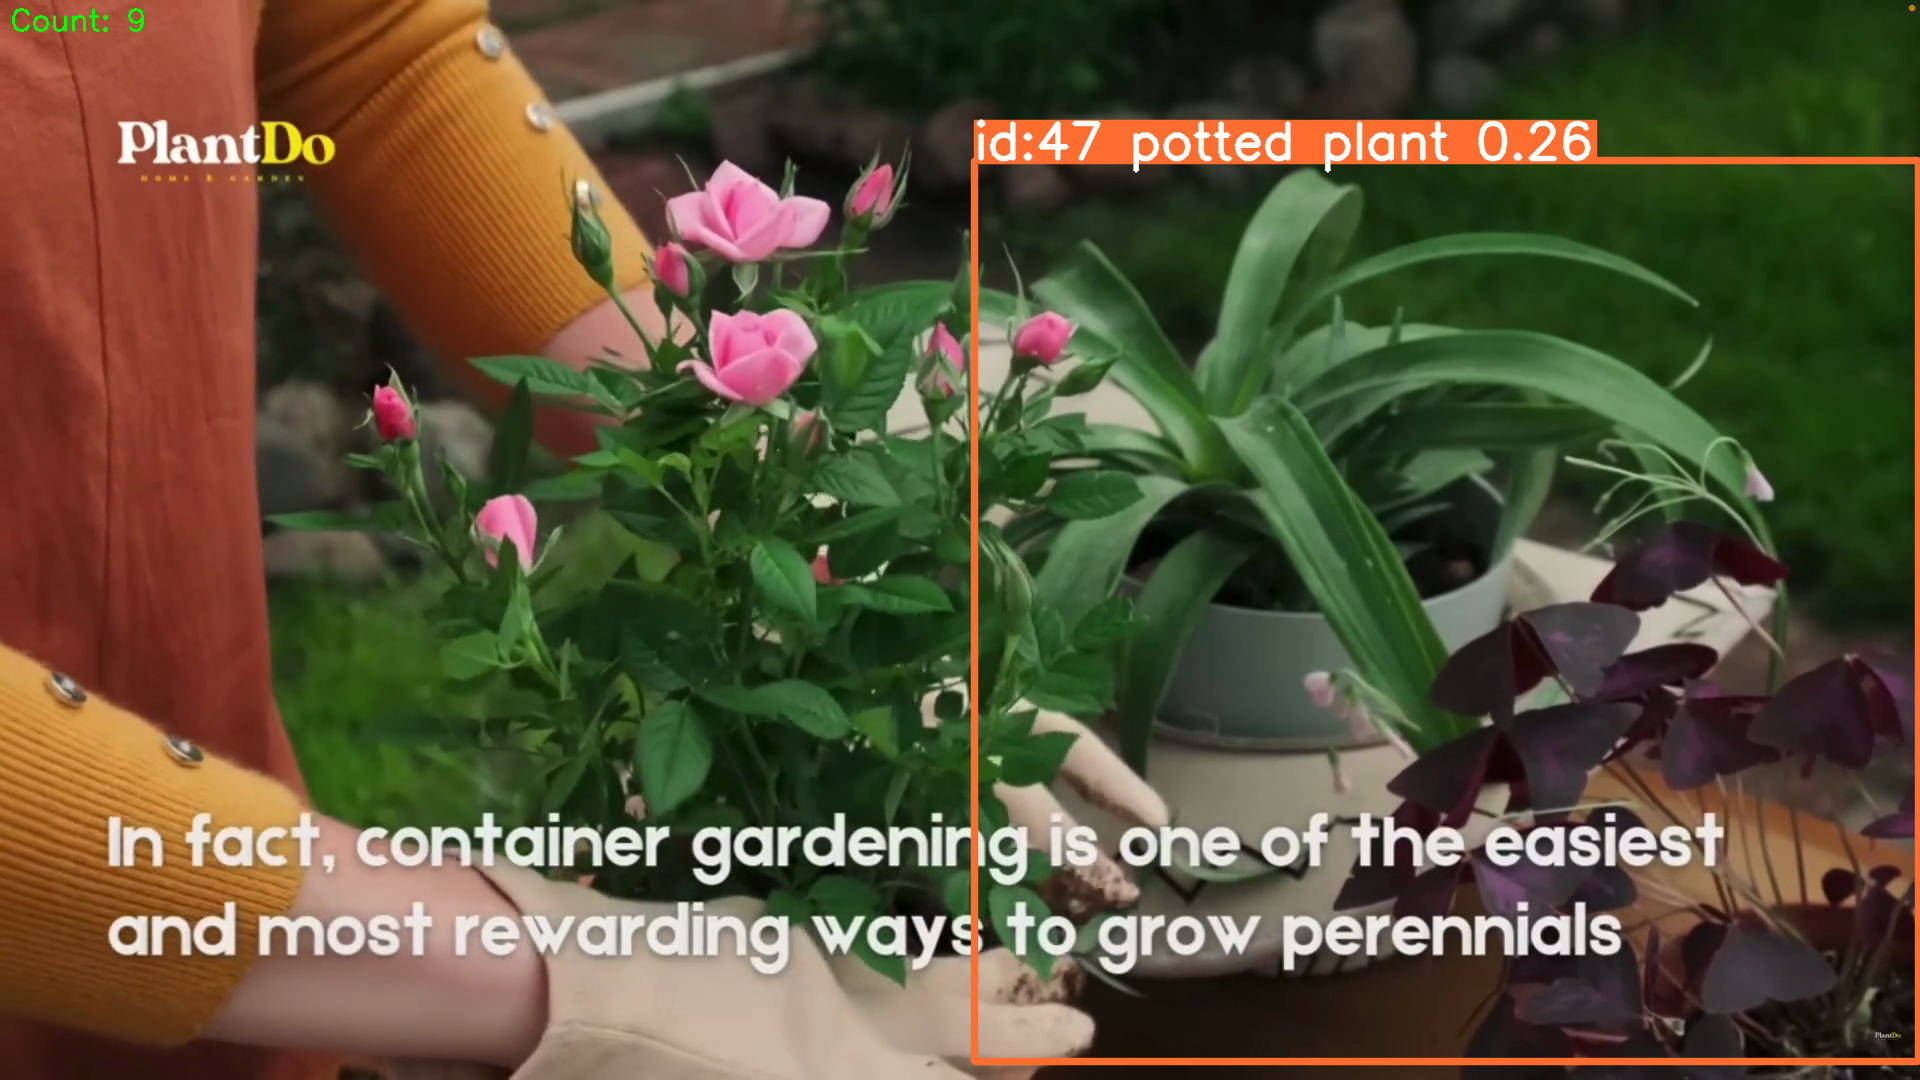
Each potted plant gets a stable tracking ID; the
setof IDs grows only when a genuinely new plant appears, giving the running Count: 9 in the corner.
import cv2
import os
import numpy as np
from ultralytics import YOLO

model = YOLO("yolov8n.pt")

VIDEO_PATH = os.path.join(os.path.dirname(os.path.abspath(__file__)), "pot.mp4")
cap = cv2.VideoCapture(VIDEO_PATH)
if not cap.isOpened():
    raise FileNotFoundError(f"Could not open video: {VIDEO_PATH}")

## variable to store the count of detected objects
unique_IDs=set()

while True:
    ret, frame=cap.read()
    if not ret:
        break
    results=model.track(frame, classes=[58],persist=True)
    ## intersection over union (IoU) is used to determine if the detected object is the same as the previous one
    ## if the IoU is greater than a certain threshold, the object is considered the same and the count is not incremented
    ## if the IoU is less than the threshold, the object is considered different and the count is incremented
    annoted_frame=results[0].plot()
    if results[0].boxes.id is not None:
        for oid in results[0].boxes.id.cpu().numpy():
            unique_IDs.add(oid)
        cv2.putText(annoted_frame, f"Count: {len(unique_IDs)}", (10, 30), cv2.FONT_HERSHEY_SIMPLEX, 1, (0, 255, 0), 2)
    cv2.imshow("Object Counting", annoted_frame)
    if cv2.waitKey(1) & 0xFF == ord('q'):
        break
cap.release()
cv2.destroyAllWindows()
Line by line:
unique_IDs = set()is the heart of the counter. Asetnever stores duplicates, so adding the same ID twice does nothing.model.track(frame, classes=[58], persist=True)switches frommodel(...)tomodel.track(...).persist=Truetells the tracker to remember objects between frames. Class58is potted plant.- Behind the scenes the tracker uses IoU (Intersection over Union) - how much a box overlaps the previous frame's box. High overlap = same object, keep its ID; low overlap = a new object, new ID (this is what the comments explain).
results[0].boxes.idholds the tracking IDs - but it'sNoneuntil the tracker locks on, so theif ... is not Noneguard avoids a crash..cpu().numpy()moves the IDs off the GPU/tensor into a plain NumPy array we can loop over; eachoidis added to the set.cv2.putText(..., f"Count: {len(unique_IDs)}", ...)stamps the live count -len(set)is the number of distinct plants seen so far.
7 · Motion-based burglar detection
The final script uses no neural network at all - just classic frame differencing. If two frames a few steps apart differ enough, something moved, and that motion is boxed and snapshotted.
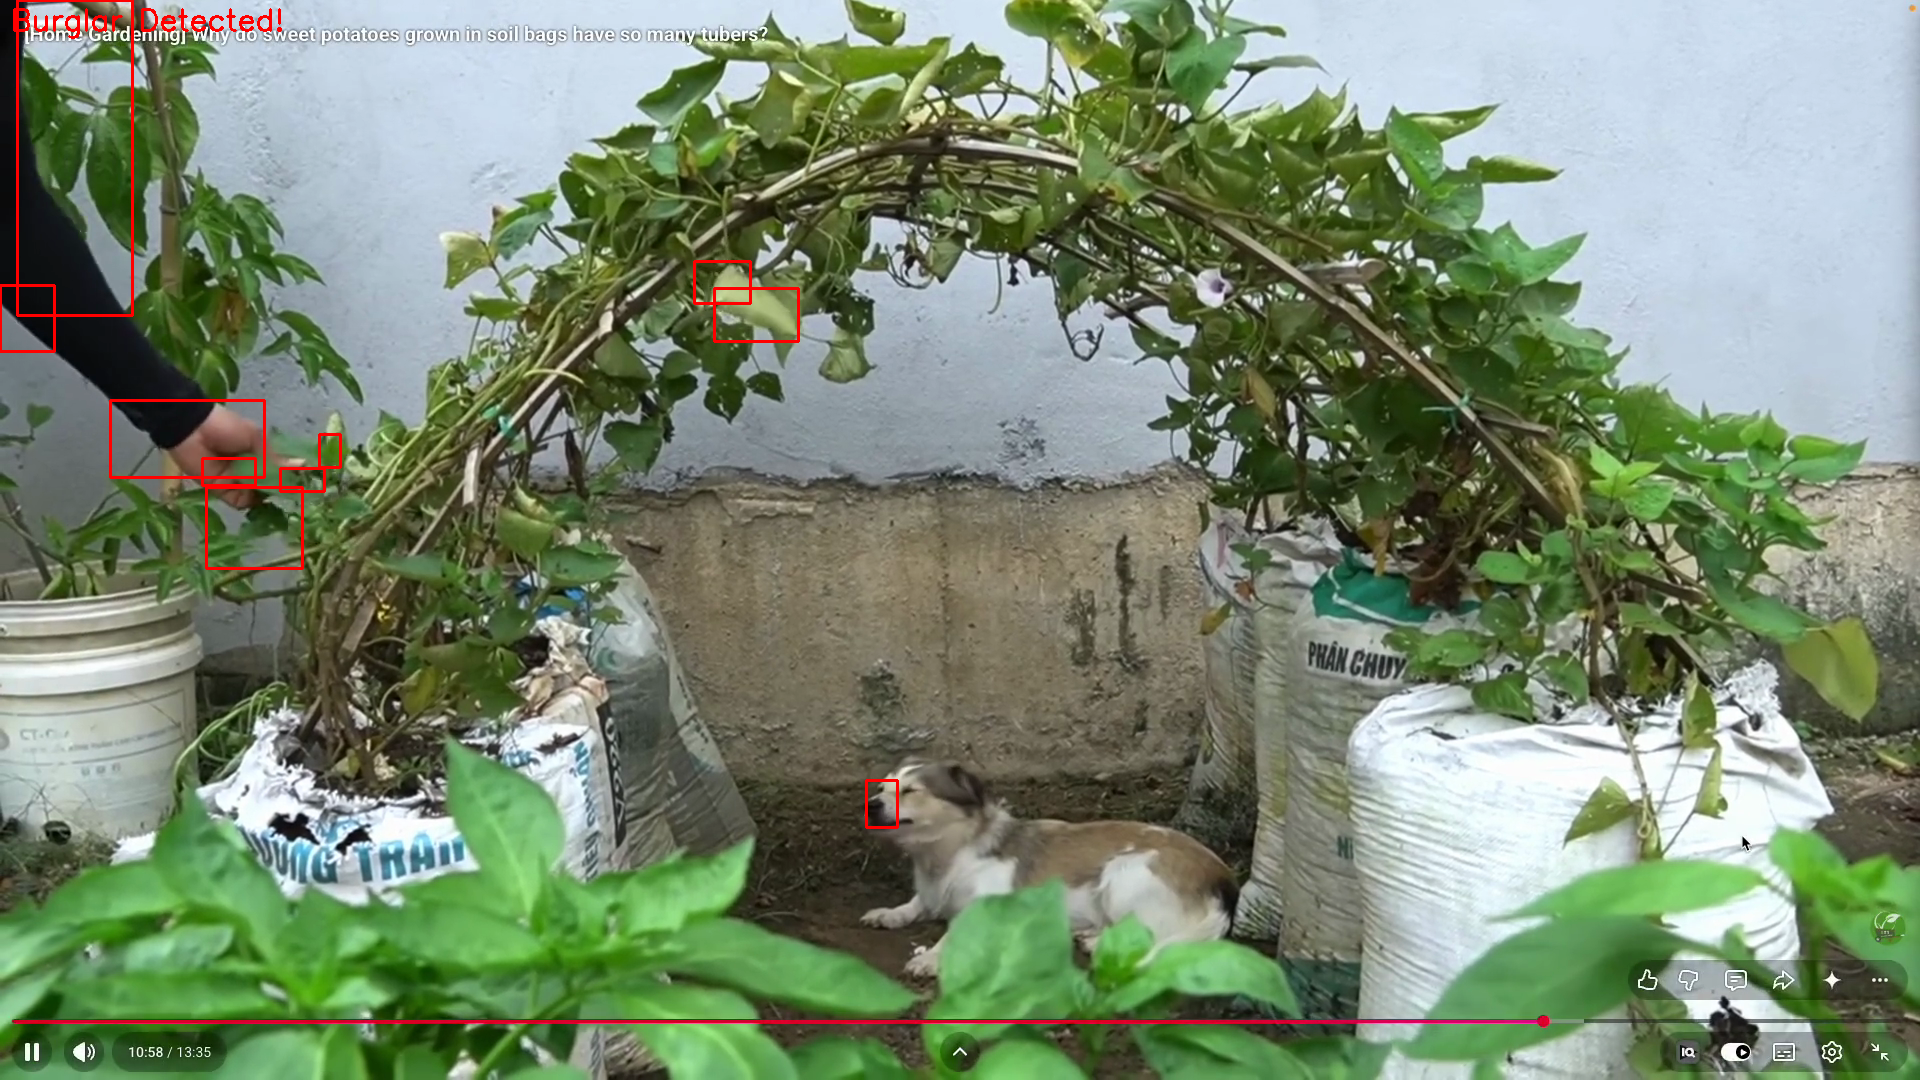
Frame differencing flags the moving region (a hand reaching in) in red and prints the alert - no model required, just pixel maths.
import cv2, os, time
os.makedirs("captures", exist_ok=True)

cam = cv2.VideoCapture(0)
if not cam.isOpened():
    print("Cannot open camera")
    exit()

frames, gap, last_saved = [], 5, 0

while True:
    ok, frame = cam.read()
    if not ok:
        break

    gray = cv2.GaussianBlur(cv2.cvtColor(frame, cv2.COLOR_BGR2GRAY), (21, 21), 0)
    frames.append(gray)
    if len(frames) > gap + 1:
        frames.pop(0)

    motion = False
    if len(frames) >= gap:
        diff = cv2.absdiff(frames[0], frames[-1])
        _, thresh = cv2.threshold(diff, 30, 255, cv2.THRESH_BINARY)
        thresh = cv2.dilate(thresh, None, iterations=2)
        contours, _ = cv2.findContours(thresh, cv2.RETR_EXTERNAL, cv2.CHAIN_APPROX_SIMPLE)

        for c in contours:
            if cv2.contourArea(c) < 500:
                continue
            motion = True
            x, y, w, h = cv2.boundingRect(c)
            cv2.rectangle(frame, (x, y), (x + w, y + h), (0, 0, 255), 2)

    if motion:
        cv2.putText(frame, "Burglar Detected!", (10, 30),
                    cv2.FONT_HERSHEY_SIMPLEX, 1, (0, 0, 255), 2)
        if time.time() - last_saved > 3:
            cv2.imwrite(f"captures/burglar_{int(time.time())}.jpg", frame)
            print("Image saved.")
            last_saved = time.time()

    cv2.imshow("Burglar Detection", frame)
    if cv2.waitKey(1) & 0xFF == ord('q'):
        break

cam.release()
cv2.destroyAllWindows()
Line by line:
os.makedirs("captures", exist_ok=True)makes the folder for saved snapshots if it isn't there yet.frames, gap, last_saved = [], 5, 0-framesis a rolling buffer of recent grayscale frames,gapis how many frames apart we compare,last_savedthrottles how often we write to disk.gray = cv2.GaussianBlur(cv2.cvtColor(frame, COLOR_BGR2GRAY), (21,21), 0)converts to grayscale and blurs it - blurring kills tiny pixel flicker so only real motion survives.frames.append(gray)thenif len(frames) > gap + 1: frames.pop(0)keeps the buffer at a fixed length - oldest frame falls off the front.cv2.absdiff(frames[0], frames[-1])is the core idea: the absolute pixel difference between the oldest and newest frame. Where nothing moved → near black; where something moved → bright.cv2.threshold(diff, 30, 255, THRESH_BINARY)turns that into pure black/white: any change above30becomes white (motion), the rest black.cv2.dilate(thresh, None, iterations=2)fattens the white blobs so nearby motion pixels merge into one solid region.cv2.findContours(...)finds the outlines of those white regions.if cv2.contourArea(c) < 500: continueignores small blobs - noise, a leaf, a shadow - and only reacts to something sizeable.cv2.boundingRect(c)gets a box around the motion;cv2.rectangle(...)draws it in red.- When motion is real, it stamps "Burglar Detected!" and, if more than 3
seconds have passed since the last save (
time.time() - last_saved > 3), writes a timestamped JPG tocaptures/. The throttle stops it saving hundreds of near-identical frames.
Key insight
The big lesson across these scripts is how little code modern computer vision takes, and how each capability is one small step from the last:
- Reading and drawing on an image is pure OpenCV.
- Detection is the same drawing, but YOLOv8 decides what and where.
- A live camera is just swapping the image source for
VideoCapture(0). - Tracking (
persist=True) adds memory, which unlocks counting. - And sometimes - the burglar detector - you need no model at all, just the difference between two frames.
For the next step up - tracing each object's exact silhouette instead of a box - see the companion Instance Segmentation with YOLOv8 project.
The other practical lesson: a pre-trained model only knows its 80 COCO classes, so it reads a plumeria as "potted plant" and confidence scores stay low on unusual scenes. For anything domain-specific (crops, tools, faces) the next step is training YOLOv8 on your own labelled data.
Tech stack
- Python 3.12
- OpenCV (
cv2) - reading, drawing, blurring, edges, contours, video I/O - Ultralytics YOLOv8 -
yolov8n.ptpre-trained detection weights - NumPy - the array type behind every image and mask
- COCO pre-trained weights - 80 object classes out of the box
- Built-in tracker (
model.track(persist=True)) - persistent IDs for counting
Reference
- Ultralytics YOLOv8 - Ultralytics Documentation
- OpenCV - OpenCV Documentation
- COCO dataset - Common Objects in Context
- Canny edge detection - OpenCV Canny tutorial